How to Manage Users and Groups
- Installation Guide
- Installation FAQs and Troubleshooting
- Basic Management Operations
- How to Manage Users and Groups (this document)
- How to Set Up Storage
- How to Set Up Virtual Clusters
- How to Add and Remove Nodes
- How to use CPU Nodes
- How to Customize Cluster by Plugins
- Troubleshooting
- How to Uninstall OpenPAI
- Upgrade Guide
Users and Groups in Basic Authentication Mode
OpenPAI is deployed in basic authentication mode by default. Groups in basic authentication mode are bound to virtual clusters (please refer to how to set up virtual clusters to configure virtual clusters). Two groups, default and admingroup will be created once OpenPAI is deployed. All users belong to default group, and have access to the default virtual cluster. All administrators belong to admingroup, and have access to all virtual clusters. If there is another virtual cluster named test-vc, and an administrator grants it to a user, the user will be in group test-vc and have access to the corresponding virtual cluster.
For example, if you create an admin user on the webportal, he will be in default and admingroup. A non-admin user will be only in default group once created. If administrator gives the non-admin user access to new-vc, he will be in default and new-vc group.
A user can see his groups in the profile page. First click View my profile in the right-top corner.
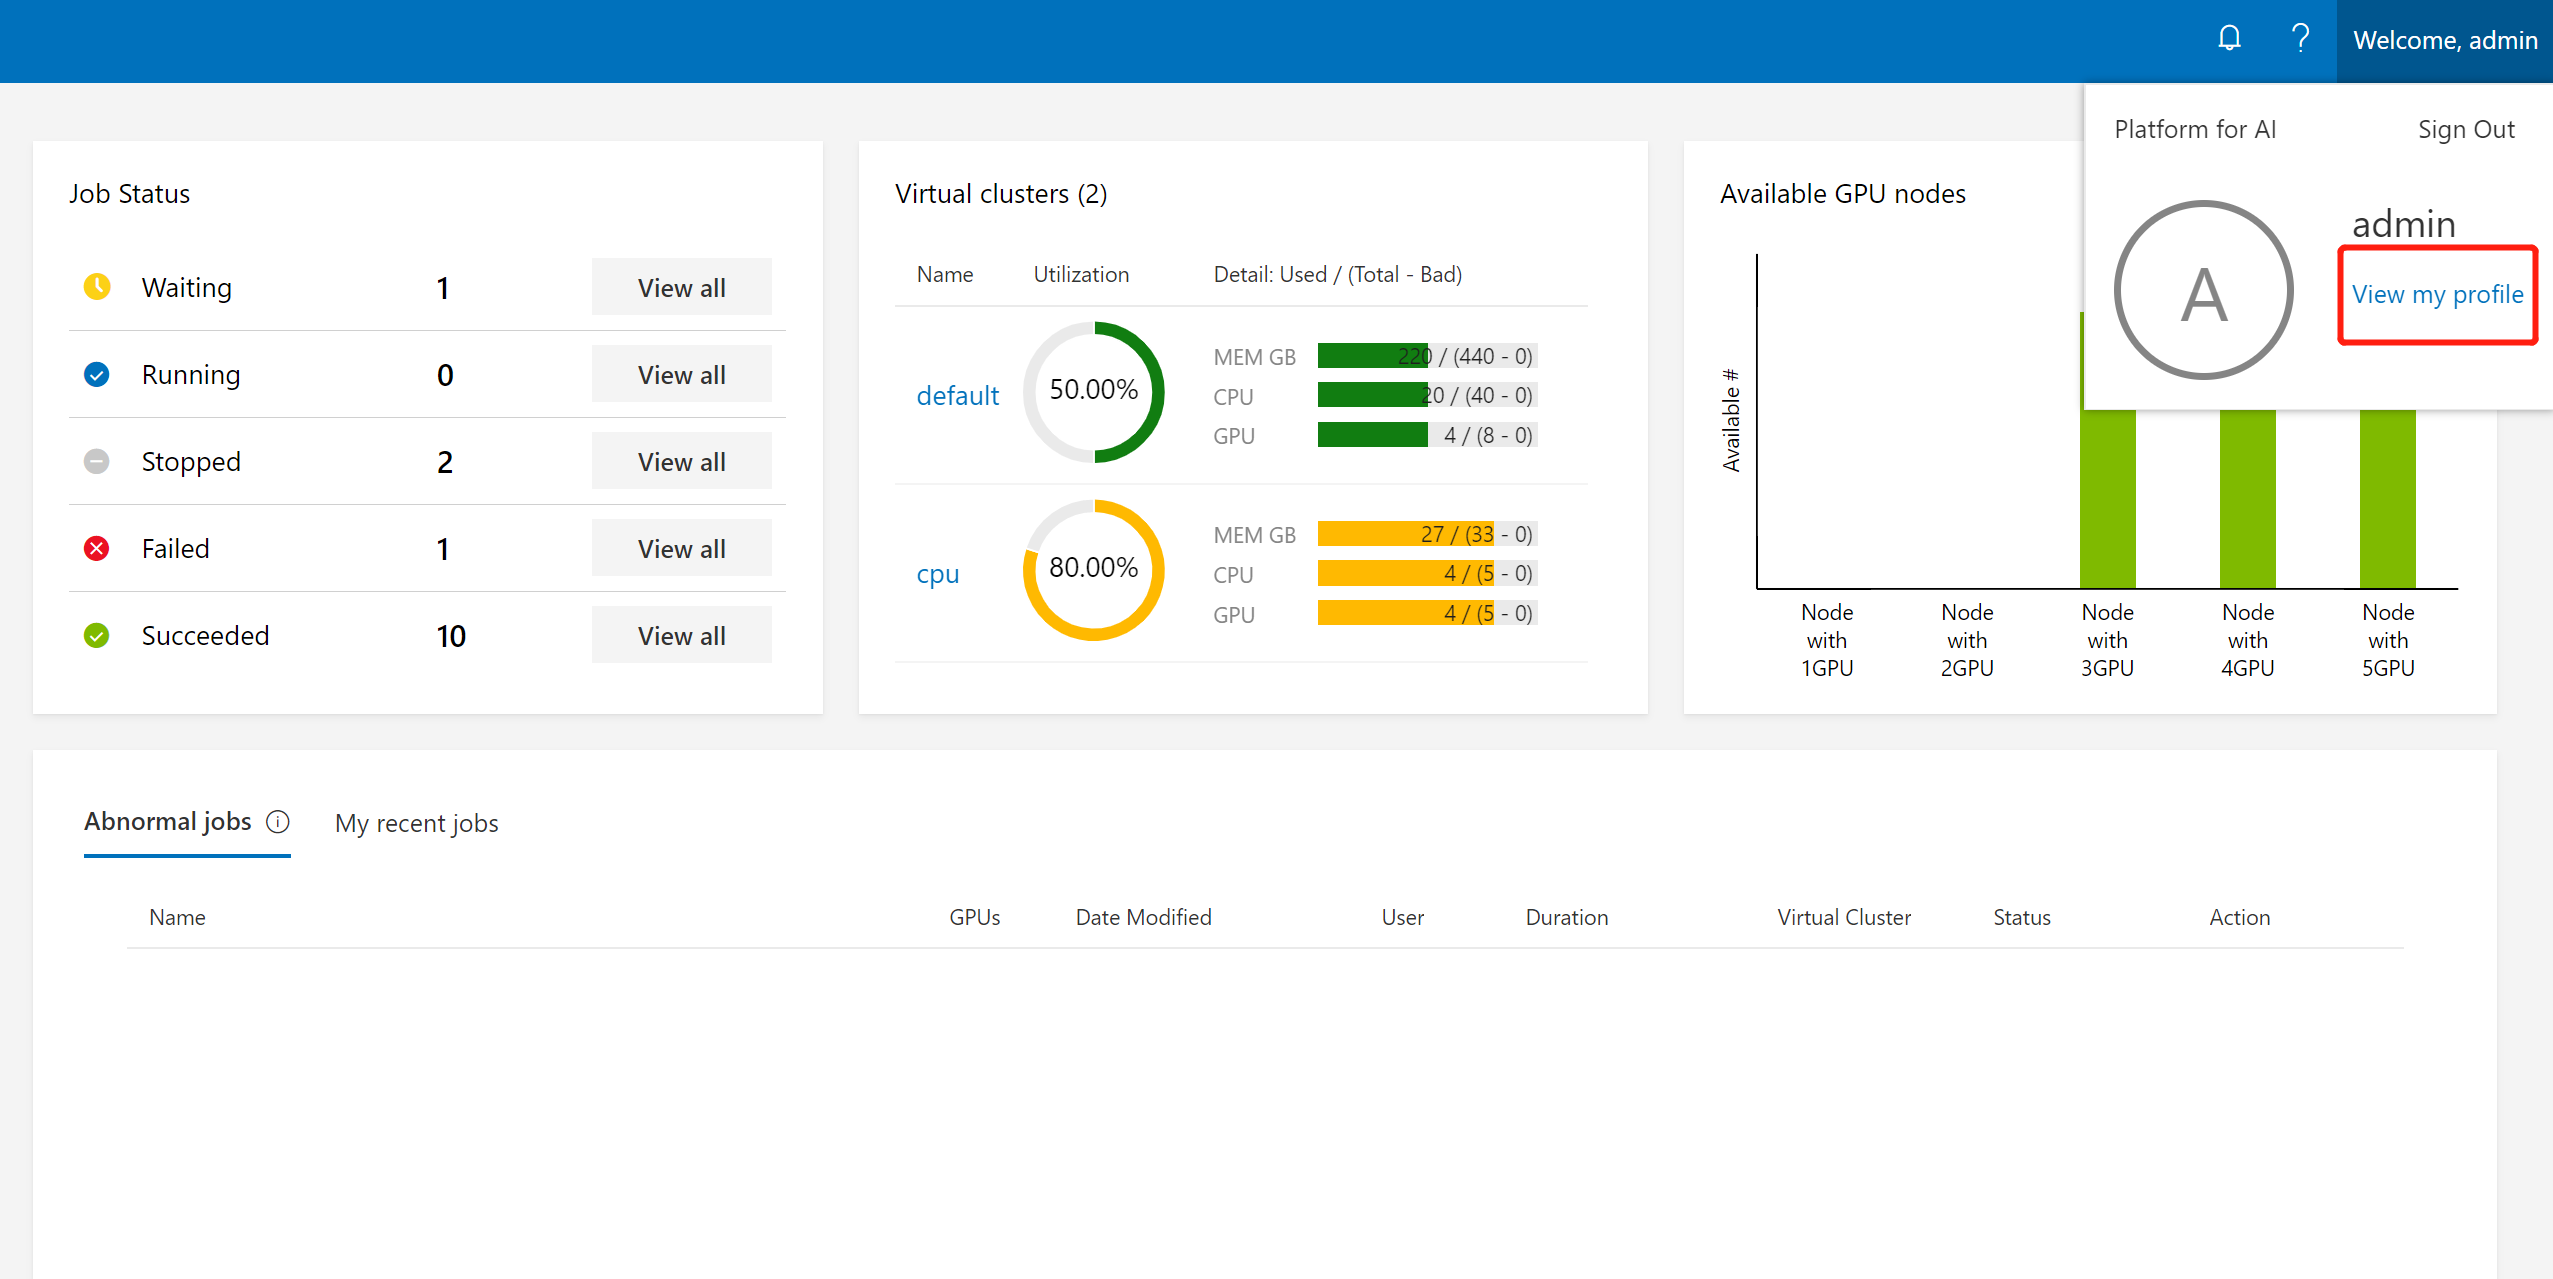
Then, the groups will be shown on that page (refer to the red box in the following picture):

Users and Groups in AAD Mode
OpenPAI can be configured to use Azure Active Directory (AAD) for user authentication instead of the default basic authentication. In AAD mode, you can sign in to an OpenPAI cluster by using your AAD authentication token.
How to Set Up AAD
In this section, we will cover how to set up the integration step by step.
Note
Previous user data in webportal is required to be mapping/migrate to AAD. Once the integration is enabled, instead of using basic user authentication, OpenPAI will switch to use (and only use) AAD as user authentication mechanism.
[Pylon] Prepare your certificate for https, self-sign cert as an example
1. Store your domain name (pylon address) into a linux env
DOMAIN={pylon address}
2. Generate RSA private key with openssl
openssl genrsa -des3 -out $DOMAIN.key 1024
In this step, password will be asked. You can just skip it with an empty value (Type enter button).
3. Generate certificate request
SUBJECT="/C=US/ST=Washington/CN=$DOMAIN"
openssl req -new -subj $SUBJECT -key $DOMAIN.key -out $DOMAIN.csr
4. Generate certificate
mv $DOMAIN.key $DOMAIN.origin.key
openssl rsa -in $DOMAIN.origin.key -out $DOMAIN.key
openssl x509 -req -days 3650 -in $DOMAIN.csr -signkey $DOMAIN.key -out $DOMAIN.crt
5. Final result
You should get the following 4 files in your current path

6. Configure pylon
Add the following configuration to your services-configuration.yaml. If you wonder what services-configuration.yaml is, please refer to PAI Service Management and Paictl.
pylon:
    port: 80
    uri: "http://master_ip:80"
    ssl:
      # self-sign
      crt_name: xxxxxx
      crt_path: /path/to/xxxxxx
      key_name: yyyyyy
      key_path: /path/to/yyyyyy
[Rest-server] Configuration AAD
1. Create Azure Active Directory
- Login into the Azure Web portal
- Azure Acive Directory -> App registrations -> New registration
- Set a name for your APP, and then finish the registration

- Find the app registered just now

- Open the app -> Authentication, and then configure the redirect URIs for OpenPAI. The redirect URIs should be
https://pylon_address/rest-server/api/v1/authn/oidc/return

- open the app -> Certificates & secrets, and then create a new client secret. Mark the secret value as
${secret_value}


- open the app -> API permissions, pls add the permission in the picture following. If the azure active directly is created by yourself and you will manage the group and user info by yourself, you could grant the permission by yourself. Or you should apply the permission through your aad's admin.

- open the app -> quickstart, then get the following value:
- Application (client) ID, mark it as
${app_id} - Directory (tenant) ID, mark it as
${tenant_id} - In the endpoints' view, you will find the OpenID Connect metadata document and mark it as
${well_known}
- Application (client) ID, mark it as

Configure authentication part in services-configuration.yaml
Add the following configuration to your services-configuration.yaml.
authentication:
  OIDC: true
  OIDC-type: AAD
  AAD:
   wellKnownURL: ${well_known}
   tenantID: ${tenant_id}
   clientID: ${app_id}
   clientSecret: ${secret_value}
   nonceLifetime: null
   nonceMaxAmount: 10
   clockSkew: null

  group-manager:
    group-data-source: ms-graph

    # Admin group name and its user list
    admin-group:
      # The group named showed in OpenPAI system.
      groupname: admingroup
      description: "admin's group"
      # The group alias (groupname) in Azure Active directory
      externalName: "team_alias_a"

    # Group for default vc.
    # For yarn default queue hack.
    default-group:
      # The group named showed in OpenPAI system.
      groupname: default
      description: "group for default vc"
      # The group alias (groupname) in Azure Active directory
      externalName: "team_alias_b"

    # If you cluster you have configured several yarn vc, except default vc (it has been created in the default-group), you should configure group for each vc in the following list
    grouplist:
    # The group named showed in OpenPAI system.
    - groupname: forexample1
      description: forexample1
    # The group alias (groupname) in Azure Active directory
      externalName: "team_alias_c"
    # The group named showed in OpenPAI system.
    - groupname: forexample2
      description: forexample2
    # The group alias (groupname) in Azure Active directory
      externalName: "team_alias_d"
Clean Previous Data
Please clean all users' data. Because in this mode, user's permission will be managed by azure active directory. The local data is useless.
./paictl.py service delete -n rest-server
After all the steps above, push the configuration, and restart all OpenPAI services.
./paictl.py service stop
./paictl.py config push -p <config-folder> -m service
./paictl.py service start
Validation
Start Service stage
After start rest-server, please ensure that the following task is successfully executed.
- namespace named
pai-groupandpai-user-v2are created

- The group in your configuration is created, in the secret of
pai-groupnamespace.

- Every group have an
aclsin extension field.


- Please Login through OpenPAI's webportal, then please check whether your user's data is created in the secret of
pai-user-v2namespace.

- please check the created user data. There should be an empty extension and a non-empty grouplist.

-
please submit a test job in default vc, and then submit the same job to another vc.
-
please check whether admin user can access to the administration tab.

- please create a vc, then check whether a corresponding group is created.


- After creating the new vc, please check whether the new vc is available for admin at home page.

- Delete the test vc, then please check whether the corresponding group is deleted.

- After deleting the vc, please check whether the group is removed from
pai-groupsecrets.

If test failed
Please try to delete the rest-server, and then try to start it again. If fail again, please provide detail information and create issue ticket in github.